Have you seen the new Cricut Iron-on Designs? Lots of fun options and they are ready to iron-on straight from the package.
Now, you may be thinking something along the lines of “If you have a Cricut, why would you want a design that’s already done? After all, with this type of machine, you can customize it just how you like it and it’s fun to boot.”
I am going to a blog conference next weekend and I have SO much to do to get ready. One of the parties is a dessert theme and I want to dress appropriately, but don’t have time to craft one up and don’t want to pay a lot for one from a store.
Note: This post contains affiliate links, which means I will make a commission (at no cost to you) if you buy through this link. I also happen to work for Cricut and help manage their blog. See my Disclosure Policy for more details.
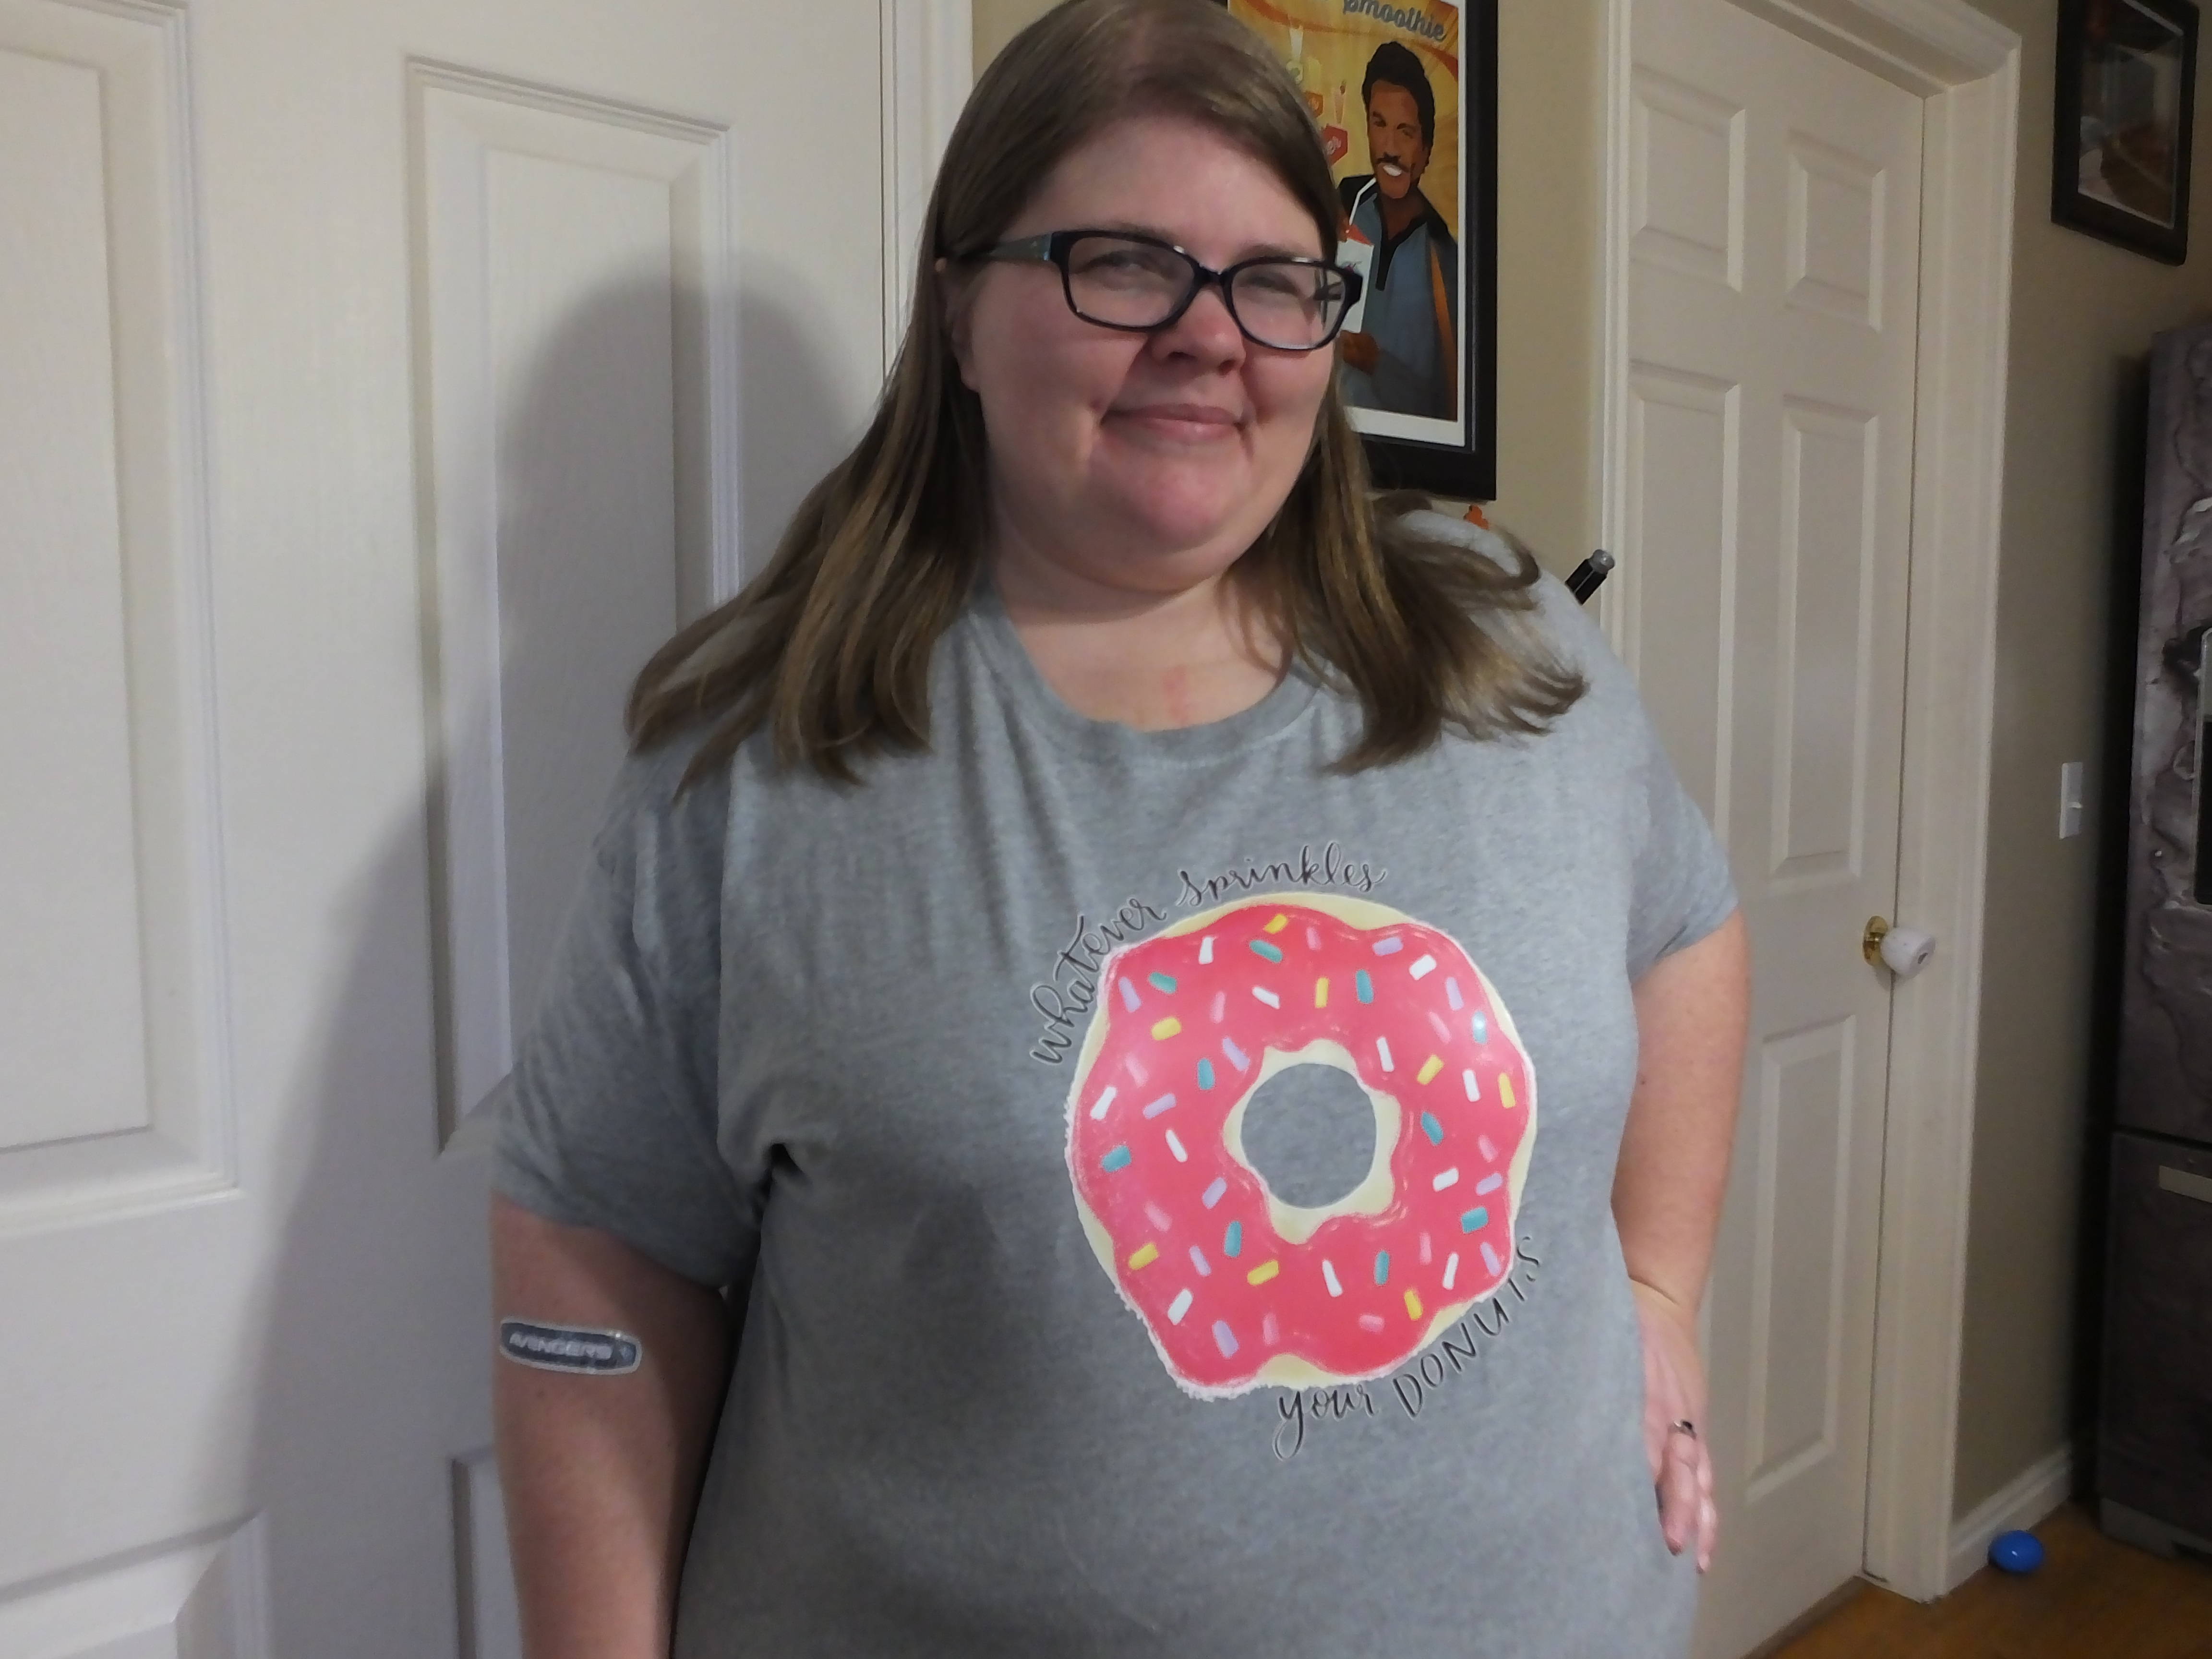
I grabbed an inexpensive men’s T-shirt from WalMart and the “Whatever Sprinkles Your Donuts” Cricut Iron-on Design at Joann. It reminds me of Homer’s doughnut on The Simpsons.
It was super quick and easy to make this! Plus, they have some pretty cute designs. These are especially great for when you’re crafting super last-minute (err…..guilty a lot of the time) or away from your machine. People who don’t have a machine yet can still have some fun and dip their toes into the world of iron-on crafting.
Examples Include:


- T-shirt
- Cricut EasyPress or iron
- Cricut “Whatever Sprinkles Your Donuts” Iron-on Design
- Silicone Mat, EasyPress Mat, or folded towel
- Teflon protective sheet (optional)
Since this is a 100% cotton shirt, I prewashed it just in case it would shrink. Start by positioning the design on the shirt to see where you want it to go.
Place it on top of the silicone mat and use the EasyPress or iron to smooth out any wrinkles and preheat the shirt in the spot where you will place the design.
Pin this now so you can find it later!
Plug in your EasyPress (or iron) and choose the time and temperature that correlates to your fabric and iron-on type in this chart. For this Iron-on Design, it said to use 340* for 50 seconds.
Now it’s time to iron on your design! You can put a Teflon sheet on top if you like to help protect it from the heat.
It took two passes since the design was so large. Once you have covered all of the design, flip it over and do it again for about 15 seconds on the back. This will help ensure that it is long-lasting.
You want to do a cold peel with these. Wait until it has cooled down before you remove the liner or it could mess up the design. Don’t wash it for at least 24 hours. When you do wash these (or any iron-on shirts,) turn it inside out and wash on cold or warm, then dry on low heat or just let it air dry.
Wasn’t that easy? Now I am ready for the Dessert party and have a fun shirt to wear around afterward.
Pin this tutorial now so you have it for later!
Have you used one of these? Which one is your favorite? Leave a comment below.