This is a sponsored post written by me on behalf of Cricut. All opinions are 100% mine.
2020 certainly has been quite different than I expected it to be. When ZZ’s school went online in March, we had to scramble to figure out how to get it done at home. Since I worked in a classroom before, I know how hard many teachers had to work to get lesson plans online with about two days’ notice, especially since most had not had training in how to create online classes. It was definitely a learning experience for us all.
Now that summer break is almost over, it’s time to think about going back to school. In our case, we chose to have her do online school for at least one term and then see what the circumstances are then. In addition to her online lessons, I will be adding at least home economics-style lessons (she loves cooking and crafts,) science experiments, and Spanish.
Even though she won’t be actually going into the school, for now, I wanted to try to make it seem at least a bit more like the usual beginning of school ritual and get our house organized. We will get her a few new special clothes and take a picture. I’m also using my lovely Cricut Joy to create some new Back-to-School crafts for her supplies.
Note: This post contains affiliate links, which means I will make a commission (at no cost to you) if you buy through this link. I also happen to work for Cricut, but these projects are my own design for this blog and not created for my job. See my Disclosure Policy for more details.
What is the Cricut Joy?
I already have both Cricut Explore Air 2 and Cricut Maker but have really enjoyed getting acquainted with my cute little Cricut Joy. I know, I know…if I have two Cricut machines already, why would I need this one too?
Eric started working from home a few months ago. He set up his workstation on my craft desk in our bedroom. I often craft on my kitchen counter anyway (dreaming of a craft room someday), but this change meant it would always happen there for now and I have to haul machines and supplies back and forth.
Since the Cricut Joy has such a small footprint, I can stash it in a drawer near there and easily pop it out for my smaller projects. It’s easier than ever to bring a machine along on trips, too.
Also, I have arthritis flares here and there (I’m not that old, but I guess it can strike at any age – who knew?) and when I am in pain, it’s a plus that this is super light, making it easier to keep on crafting.
Like my other Cricut machines, it can also write. If I want to get fancy, I can quickly get it to write in elegant lettering on an envelope, make labels, create cards, name tags, and more!
A new feature is the ability to cut even without mats. They have new Smart Materials that you can feed straight into the machine. There are small mats you can use with your other materials.
Head on over to the Cricut shop to get your own Cricut Joy.
Now, without further ado..let’s get crafting!

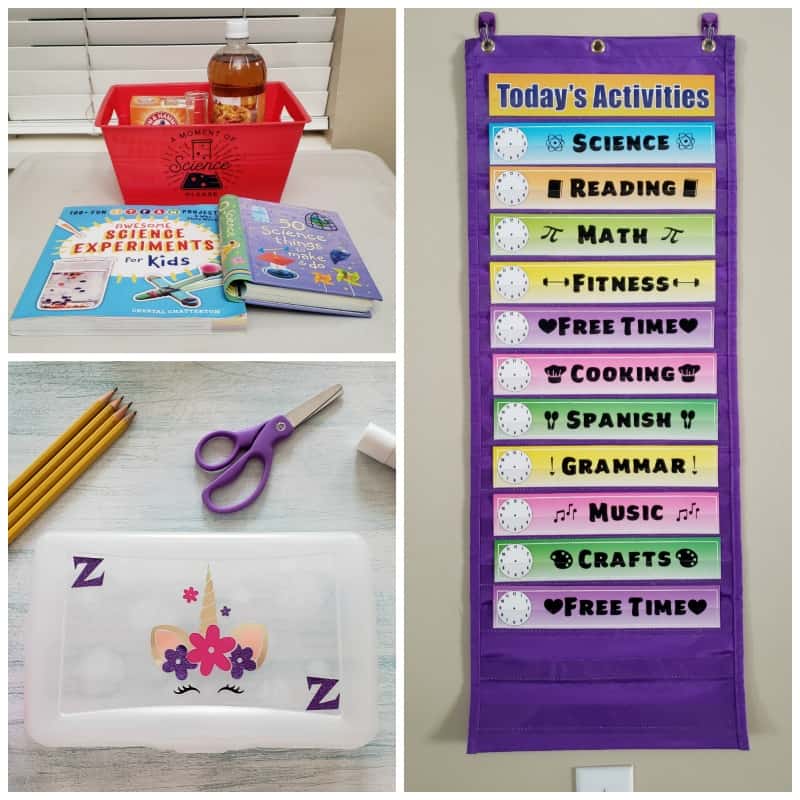
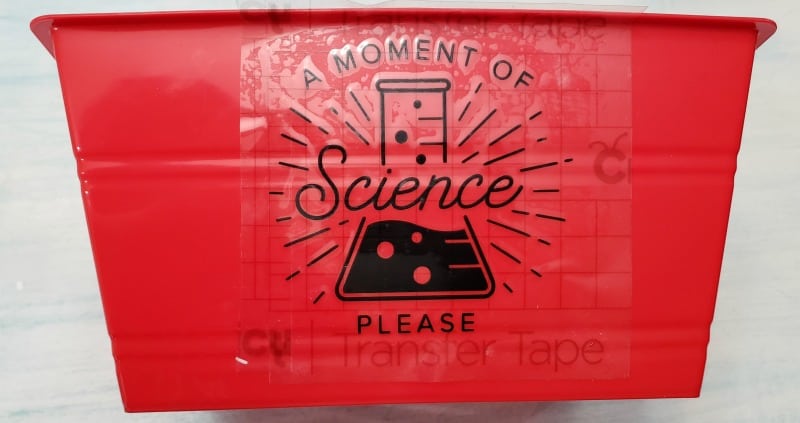
Science Experiment Bin
Zelda is really into science. She collects rocks everywhere we go, watches National Geographic, reads science books, the works. It makes my heart proud. However, she is also really into creating experiments on her own, with quite messy or disastrous results. I definitely love this hunger for knowledge and want to help her explore, but control it a bit more.
I thought if I made up a special bin and created a new science experiment every school day, it might help avoid the chaotic side effects of her exploration. I chuckled a bit when I came across this punny image in Cricut Design Space. Perfection!
Materials:
- Cricut Joy
- Cricut Joy StandardGrip Mat
- Cricut Premium Removable Vinyl
- Cricut Joy Transfer Tape
- Cricut Weeder
- Cricut Scraper
- Plastic bin (I got this one at Dollar Tree)

1: Create Your Design
Open Cricut Design Space and start a new project. This image is part of the Teacher Gifts cartridge. Resize it to fit onto your bin.

2: Cut Your Vinyl
When you hit Make It, you can choose what sort of material and whether you will be using a mat or not. Watch as it cuts it out lickety-split!
3: Apply Transfer Tape and Reverse Weed
Normally I weed my design first, then add the transfer tape. Since this image has tiny pieces, though, you will want to do some reverse weeding. Otherwise, it will likely end up looking like this:

When you reverse weed, you start by placing the transfer tape onto your freshly cut vinyl. Burnish it using the scraper. Flip it over and remove the backing. Follow up by carefully removing the extra vinyl. If part of your design starts to lift, push it back onto the tape.
4: Apply to Bin
Place the design where you would like it on your bin. Use your scraper to firmly attach it. Carefully peel back the transfer tape and watch for lifting pieces.
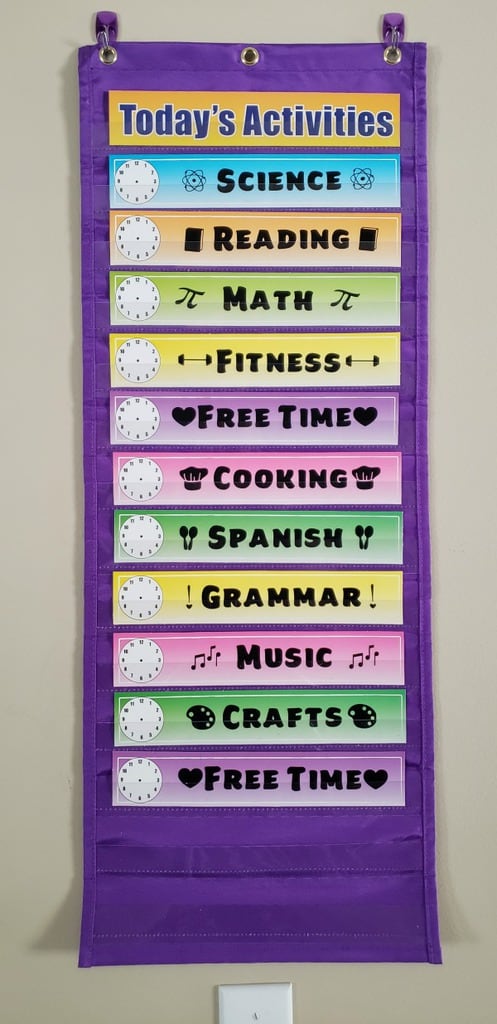
Daily Activities Cards
Kids thrive on routines and schools are structured based on those. I decided it would be useful to have a daily schedule posted to help keep us both on track. Amazon had this pocket chart that works well for daily activities. It came with cards that just needed to be customized. Until school starts, I will leave the clock part blank since I don’t know what the specific program will look like. These are dry erase cards so it will be easy to add the hands later.
Materials:
- Pocket Chart with Cards
- Cricut Joy
- Cricut Joy StandardGrip Mat
- Cricut Premium Removable Vinyl
- Cricut Joy Transfer Tape
- Cricut Weeder
- Cricut Scraper
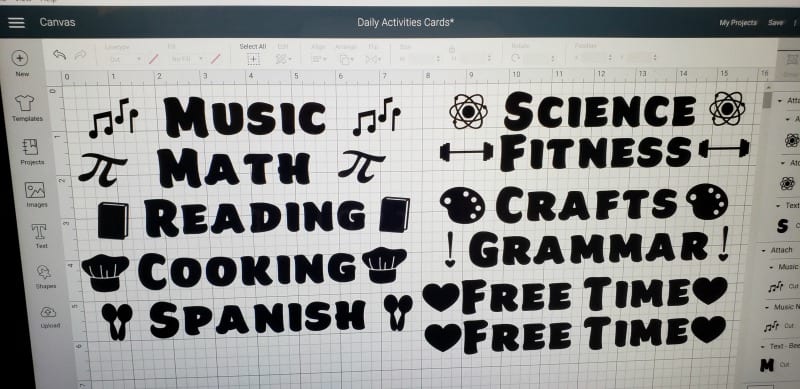
1. Create Your Design
Make a list of the different activities you might be doing. Create a rectangle that is the same size as the available space on the card (in my case, 1″ x 8″) to ensure that the entire design would fit. Use a color that is different than your design for visibility. I used the Beefcakes font for this project.

After typing out the word and placing it in the middle of the rectangle, find an image in Cricut Design Space that matches the activity and place it on each side. Once they are lined up in a row, move the rectangle to the side. Click next to the left of the design and drag to highlight everything, then press Attach. This will keep them lined up properly when you cut.
If you want to use the designs I made, you can find them here: Daily Activity Cards
2: Cut and Weed Design.
Follow the prompts once you hit Make It for your project. Load the mat and cut out the vinyl. Most of these designs can be weeded regularly, though you may want to use reverse weeding (as outlined in the previous project) for the ones with thin designs like Science.

3. Apply Transfer Tape and Put Onto Cards
Use the scraper to burnish the design once you have applied the transfer tape. Remove the backing and center it on the card. Scrape the design, then lift the transfer tape.
And finally…

Unicorn Pencil Box
Zelda is a huge fan of anything with unicorns on it, so this cute image from the Unicorn Hair, Don’t Care cartridge is perfect. I also added in letters for her nickname, ZZ. This one is a little more detailed since there are several colors to layer, but the Cricut Joy makes it quick and easy to cut them all, especially when I used the Smart Vinyl.
Materials:
- Pencil Box
- Cricut Joy
- Cricut Joy StandardGrip Mat
- Cricut Smart Vinyl (Champagne and Petal)
- Cricut Glitter Vinyl (purple; can also use standard removable instead)
- Cricut Premium Removable Vinyl (Black and Fuchsia)
- Cricut Joy Transfer Tape
- Cricut Weeder
- Cricut Scraper

1: Create Your Design
I chose this pretty floral design from the cartridge. There are many different choices, including ones for various holidays. Change it to the desired size for your box. Add letters on either side if desired. If you do use them, you can move the unicorn to the side, then click and drag to highlight both letters. Click Attach, which will keep them properly spaced apart. I ended up placing them separately on mine.
Click here to use this design: Unicorn Pencil Box

2: Cut Out and Weed the Design
Once you hit Make It, your design will be split into different mats by color. For each one, choose whether you are using a mat or not and what type of material it is. Weed the excess vinyl, using reverse weeding for colors with tiny pieces if needed.

3: Apply the Transfer Tape and Layer Onto the Box
After you have the transfer tape on each color and burnish to firmly attach using a scraper, you can start layering onto the box. Remember to use the StrongGrip transfer tape found inside the roll of glitter vinyl for that layer. Start with the one that had the horn and ears. Once applied, burnish and remove the transfer tape.

Next, put the ears, then both colors of flowers, removing the tape after every layer. Finally, add eyelashes. If you are using letters, add them at any time after the horn layer.
What back to school crafts are you making this year?
Do you have the Cricut Joy yet? What is your favorite feature?