
When I learned that Cricut was sending me their new Explore 3, I knew exactly the project that I had been wanting to do for a while that would be perfect to showcase one of its best new features.
One of my favorite Zelda characters (besides Link and Zelda, of course) is Marin from Link’s Awakening. We didn’t have a Game Boy when I was growing up (though we did have all of the Nintendo consoles), so I didn’t play this game until it came out on the Nintendo Switch.
It was fun to see a leading girl character who wasn’t just there always in distress, waiting to be saved. She helped Link when he washed up on their tropical island and wanted to get to know more about him, as she was clearly smitten by him. There are fun little details you learn along the way. She is very good at her village’s claw game (the Trendy Game) and there is an amusing demonstration of this if the player brings her into that area. She has a bit of a naughty side that pops up if Link messes with the Cuccos too many times. Marin teases Link a bit about his ocarina playing skills. Just a fun character all around.
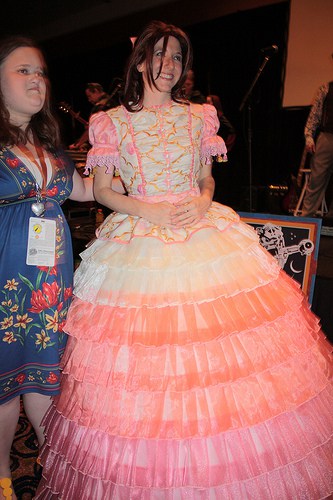
The Super Smash Bros. version of her costume has gold trim all along the hem and sleeves. With the Cricut Explore 3, you can cut their Smart iron-on up to 9′ long (up to 12′ if they come out with longer rolls, and it needs to be the Smart kind to do these longer off-the-mat cuts), meaning that you can just cut one long piece instead of a lot of shorter pieces that you have to try to line up precisely.
This can also be helpful if you need to add details to a costume but don’t have the skill, time, or desire to do something like hand appliqué. It isn’t limited to just fabric, either; I have used iron-on with wood, for example.
Ready to take your costumes to the next level? Here’s how you can add iron-on to your next cosplay.
Materials for Cricut Costumes Detail
- Your material
- Cricut Explore 3
- Cricut Roll Holder
- Cricut Smart Iron-on (I used gold glitter, but they also have standard and holographic)
- Weeder
- Cricut EasyPress or iron
- Cricut EasyPress Mat or towel
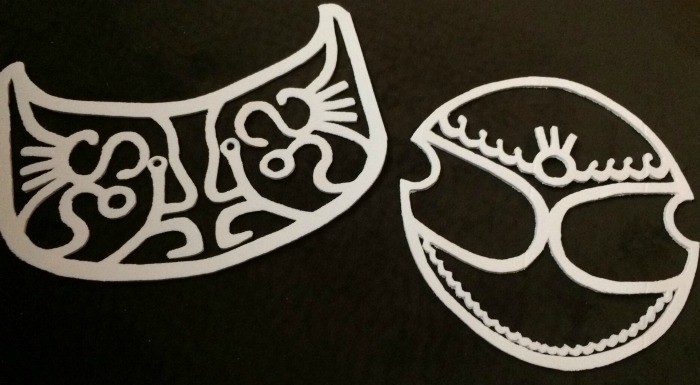
1: Create and Upload Your Pattern
You will need to upload your pattern to Cricut Design Space so the machine knows how to cut it. The file will need to be in one of seven formats: SVG, PNG, JPG, DXF, GIF, HEIC, or BMP. You can search for one online or create it yourself.
For this costume, I bought the Island Awakening dress pattern from CosplayWithMeridah on Etsy and it came as a PDF, which is not a file type supported by Cricut. I was able to convert it to a JPEG, making sure I was at 100% scale so it was the right size.

Next, you will need to click on Upload Image. You can choose what type it is and then use the tools to click and remove any parts you don’t want to be cut, like the background. You will see a checkerboard pattern in areas that will not be cut. Once you are done, choose the Cut version, name and tag it, then upload it into your canvas.
2: Get Your Design Ready for Cutting

Add in all of your different parts. Measure your material and make sure the designs are sized to fit on there appropriately. If you are using different colors, change each part to match to help you know which vinyl to use for each design. Name and save the project so it’s ready to use.
3: Cut Your Iron-On

Hit Make It and you will be taken to a screen for review. It will tell you the length you will need to be able to cut out your design. Once you make sure that you have enough Smart Iron-on available, click on Continue. Choose the specific type that you are using.
![]()
Load your Smart Iron-on into the machine. You can use the roll holder to help manage the long lengths. Press the flashing button after clicking Go and it will cut it out for you.
4: Weed Iron-on and Apply to Material

Weed away your unneeded iron-on. The transfer sheet is sticky and will hold it steady for pressing after you apply it to your material.

Depending on your costume, you may have some curves in your material. Cutting slits in the transfer sheet can help you adjust to the curves better.
5: Press Your Smart Iron-on
Use Cricut’s heat guide to determine the temperature and length of time to press your iron-on. If your particular material isn’t listed, find a similar type. My dress was made of taffeta, which I knew needed lower temperatures for ironing. The setting for muslin was lower than others and worked well for me. Follow the instructions for peeling the transfer sheet away; for mine, I peeled it away slowly after cooling. Some types of iron-on have you peel while warm.
I am so excited to have a beautiful Marin costume in my collection. I even took it to Hawaii to create an awesome photoshoot; after all, the game takes place on a desert island, right?
What costumes would you make and use a Cricut Explore 3 to customize?

Daydreaming on Koholint Island
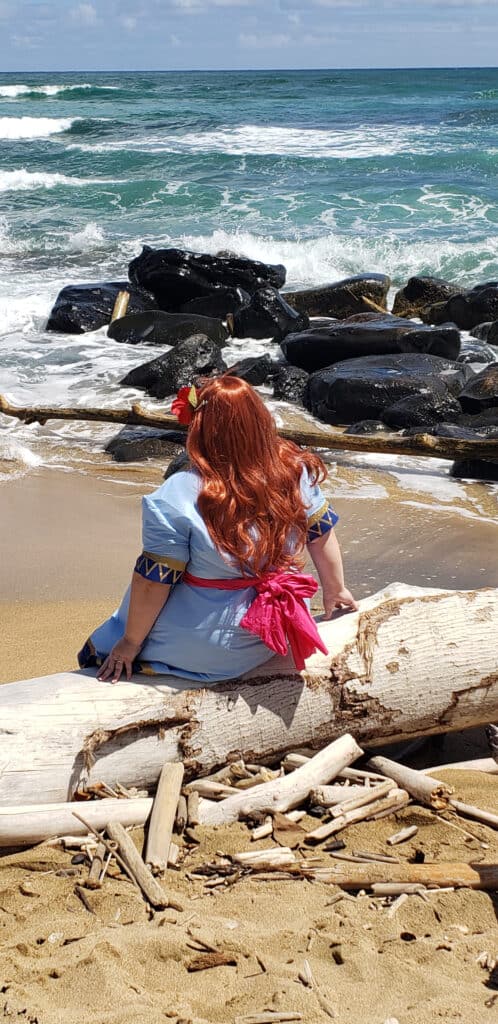
Waiting for Link to show up here on Toronbo Shores

(No chickens were harmed during this photoshoot 😉 )

If only I was good at claw machines as Marin is…